What Are You Good At? Find Your Best Way to Make Money
Here’s a simple table that matches your teaching strengths with money-making ideas.
What You’re Good At | How to Make Money From It | How Hard to Start | Realistic Monthly Income | Time Needed |
|---|---|---|---|---|
Planning lessons | Selling teaching materials | Easy | $30-$200 | 5-10 hrs/week |
Subject knowledge | Creating mini-courses | Medium | $50-$500 | 10-15 hrs to create, 2-5 hrs/week after |
Writing & speaking | Blogging or YouTube | Medium | $0-$200 (after 6+ months) | 8-12 hrs/week |
Organization | Planners and systems | Easy | $30-$150 | 5-8 hrs/week |
Making visuals | Printable worksheets | Easy | $30-$150 | 4-6 hrs/week |
Speaking clearly | Podcasts/audiobooks | Medium | $0-$100 (after 6+ months) | 6-10 hrs/week |
Creating tests | Test prep materials | Medium | $50-$250 | 8-12 hrs/week |
Managing classrooms | Behavior tools for teachers | Easy | $30-$150 | 4-8 hrs/week |
–
68 Teacher-Friendly Income Ideas
Here are 68 ideas for passive income that teachers can start with, from simple to more involved. You might find some that fit your skills and schedule perfectly.
Core Teaching Materials
- Worksheets – Simple printable activities
- Lesson plans – Ready-to-use teaching plans
- Workbooks – Combined worksheets on one topic
- Complete curriculum packages – Full teaching units
- Study guides – Comprehensive review materials
- Flipped classroom tools – Home/class activity pairs
- Question banks – Ready-to-use test questions
- Research guides – Student project frameworks
- Interactive notebooks – Student engagement templates
- Project-based learning units – Complete frameworks
Planning & Organization
- Teacher planners – Help others organize
- Weekly planning sheets – Customized for teachers
- Classroom labels – Organization printables
- Teacher productivity tools – Special calendars, etc.
- Substitute teacher plans – Emergency lesson kits
- Conference forms – Parent-teacher meeting tools
- Parent communication templates – Save teachers time
Subject-Specific Resources
- Math manipulative printables – Hands-on resources
- Science experiment guides – Lab instructions
- History document studies – Primary source activities
- Language learning activities – Foreign language tools
- Reading center materials – Literacy development
- Reading strategy materials – Comprehension builders
- Writing prompts – Student writing starters
- STEM challenge cards – Science and engineering tasks
- Vocabulary card sets – Subject terminology
- Art project instructions – Step-by-step creative guides
- Music teaching resources – Theory worksheets
- PE activity cards – Movement and game instructions
- Speech and debate resources – Communication builders
Differentiated Instruction
- Mixed-ability materials – For varied learning needs
- Early finisher activities – Keep students engaged
- Special education resources – IEP/504 support materials
- Intervention materials – For struggling learners
- Extension activities – For advanced students
- ELL/ESL resources – For language learners
Classroom Management & Behavior
- Classroom management tools – Behavior charts, etc.
- Behavior systems – Complete management plans
- Classroom economy systems – Financial literacy tools
- Character education materials – Social-emotional learning
Creative & Visual Resources
- Classroom decoration printables – Bulletin boards, etc.
- Learning posters – Visual classroom aids
- Digital stickers – For online learning
- Classroom photos – Sell your setup pictures
- Classroom transformation kits – Immersive learning themes
Assessment & Evaluation
- Test prep packets – Help students prepare
- Grading rubrics – Assessment tools for any subject
- Custom assessments – Tests by subject
- Flashcard sets – Digital or printable
Digital Content Creation
- Teaching blog – Share ideas and earn from ads
- Teaching videos – YouTube content with ads
- Subject-focused website – Your specialty area
- Teaching podcasts – Audio content for teachers
- Educational animations – Simple explainer videos
- Premium video lessons – Subscription access
- Virtual field trips – Recorded tours with lessons
- Educational app content – Activities for learning apps
Games & Activities
- Educational games – Printable or digital learning games
- Book club materials – Reading discussion guides
- Digital escape rooms – Problem-solving activities
Teacher Professional Development
- Mini-courses – Teach one specific skill
- eBooks – Short guides on teaching topics
- Teacher workshops – Recorded training sessions
- Teacher membership site – Monthly subscribers
- Grant application templates – Help teachers get funding
- Technology integration guides – Help teachers use tech
Seasonal & Merchandise
- Seasonal activity packs – Holiday-themed learning
- Teacher t-shirts/mugs – Designed once, printed on demand
–
Turn What You Already Have Into Income
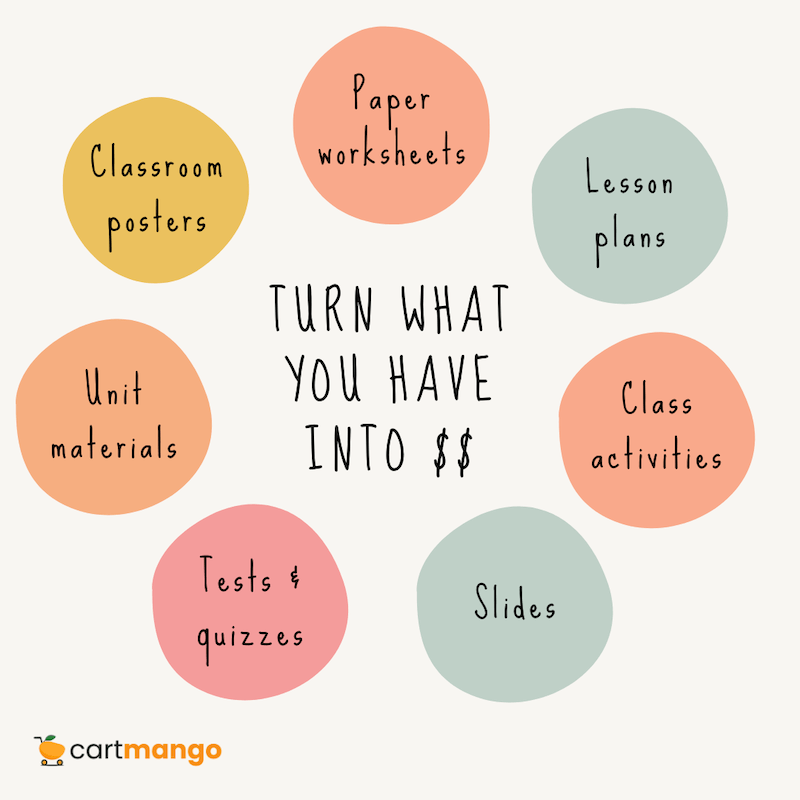
You don’t need to create everything from scratch.
You probably have teaching materials sitting on your computer right now that could make money with a few tweaks.
What You Already Have | How to Turn It Into a Product | How Long It Takes | What You Can Charge | Best For |
|---|---|---|---|---|
Paper worksheets | Take pictures, clean up in Canva | 30-60 mins | $2-$5 per resource | Quick start |
Lesson plans | Add clear instructions anyone can follow | 1-2 hours | $3-$10 per plan | Subject experts |
Activities you use in class | Add parent/home instructions | 1-2 hours | $3-$8 per activity | Elementary teachers |
PowerPoint slides | Add notes so they work without you | 1-3 hours | $5-$15 per set | Middle/high school |
Tests and quizzes | Add answer keys and study tips | 1-2 hours | $3-$10 per test | Test prep |
Unit materials | Package everything together | 2-4 hours | $10-$25 per bundle | Experienced teachers |
Classroom posters | Make printable versions | 30-90 mins | $2-$8 per set | Visual learners |
Look through your teaching files tonight. I bet you’ll find at least 3-5 things you could polish up and sell by the weekend. Those worksheets you spent hours making? Other teachers would happily pay for them rather than starting from zero.
Your old PowerPoint presentations can become self-guided lessons with a few added notes.
That test review packet? Add an answer key and some study tips, and you’ve got a sellable product.
–
What Sells Best: Digital Teaching Materials
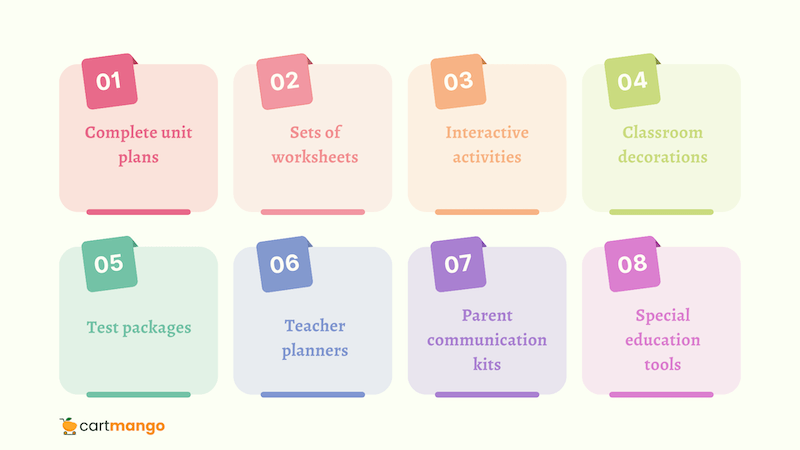
These are the types of teaching materials that sell most consistently.
–
What to Sell | Good Price Range | Time to Create | Who Will Buy It |
|---|---|---|---|
Complete unit plans | $8-$15 | 5-10 hours | Teachers in your subject |
Sets of worksheets | $4-$8 | 3-6 hours | Multiple grade levels |
Interactive activities | $3-$8 | 2-5 hours | Tech-friendly teachers |
Classroom decorations | $3-$8 | 3-8 hours | Elementary teachers |
Test packages | $5-$12 | 4-8 hours | Test-focused schools |
Teacher planners | $4-$8 | 4-10 hours | Organized teachers |
Parent communication kits | $3-$7 | 3-6 hours | Elementary/middle school |
Special education tools | $5-$15 | 5-12 hours | Special education teachers |
The best-selling products solve specific problems. Teachers are always looking for ready-to-use resources that save them time. A well-designed, comprehensive unit plan can save another teacher 10+ hours of work.
Focus on quality over quantity at first. 5 excellent resources will sell better than 20 rushed ones. Make sure your materials look professional, include clear instructions, and solve a specific teaching challenge.
–
Your First 30 Days: Getting Started Plan
Here’s a simple month-long plan to get your teacher side business up and running:
Week 1: Choose your first product
Look at the table of strengths above and pick something that matches what you’re good at. Keep it simple for your first product. Maybe start with a resource you’ve already created that just needs polishing.
Week 2: Set up where you’ll sell
Create a CartMango account (free for at least 2025) to sell your products. It doesn’t require any tech skills. You’ll need to connect it to a payment processor like Stripe or PayPal. Disclaimer: This is my tool, but you might already know since you’re on CartMango’s site 🙂
Week 3: Create and polish your product
Spend a few evenings or one weekend creating or improving your product. Make sure it looks professional and includes clear instructions. Test it yourself to make sure everything works properly.
Week 4: Tell people about your product
Share your new product on social media, in teacher Facebook groups (where allowed), or via email to colleagues. Even telling just 10-20 fellow teachers can lead to your first sales.
–
Don’t worry about getting everything perfect.
Many successful teacher-sellers say they wish they’d started sooner instead of waiting for “perfect” products.
You can always improve things based on feedback.
–
Making Your Products Look Professional
You don’t need expensive software or design skills to create professional-looking teaching materials.
A few simple tricks will make your products stand out:
1/ Use Canva’s free teacher templates to create materials that look great
Their pre-made layouts make it easy to create worksheets, presentations, and other resources quickly.
2/ Stick to 2-3 fonts at most in your materials
Too many different fonts make products look messy and unprofessional. One font for headings and one for body text is usually perfect.
3/ Use consistent colors throughout your products
Pick 2-3 main colors and use them consistently. This creates a professional, cohesive look that buyers notice.
4/ White space is your friend
Don’t cram too much onto one page. Give your content room to breathe, with margins and spacing between elements.
5/ Always proofread everything twice
Nothing turns buyers away faster than spelling mistakes or grammar errors. If possible, have a colleague look over your materials before you list them for sale.
–
Selling Your Products: Simple Setup
Setting up a system to sell your teaching materials is much easier than most people think. You don’t need to know how to code or design a website.
CartMango works well for teachers because it has no monthly fees and takes just minutes to set up. You only pay a small fee when you make a sale, which means no risk to get started.
With digital delivery, buyers get your files automatically after they purchase. This means you can be teaching in your classroom while sales happen on their own. No need to manually email files to each buyer.
Protect your files by delivering them through a secure system rather than just attaching them to emails. This helps prevent unauthorized sharing of your hard work. CartMango also takes care of this part for you.
Get paid directly to your bank account through services like Stripe or PayPal.
Creating a simple storefront helps customers find all your products in one place. Add a brief teacher bio and organize your resources by subject or grade level to make shopping easy.
–
Building a Teacher Blog or Website
A blog can bring in extra income while also promoting your teaching products. It doesn’t have to be complicated to get started.
Set up a simple website in one afternoon using platforms like WordPress or Wix. Their drag-and-drop tools mean you don’t need any coding knowledge. Choose a template designed for blogs or simple businesses.
Write about topics that interest other teachers in your subject area or grade level. Share teaching tips, classroom management ideas, or reviews of resources you love. Personal stories from your classroom (keeping students anonymous) also tend to attract readers.
You can make money from your blog in several ways. Display ads (through services like Google AdSense) pay you when visitors view or click ads. Affiliate links earn you a commission when readers purchase products you recommend. And of course, you can sell your own teaching materials.
Pinterest is especially powerful for teacher blogs.

Create eye-catching pins for each blog post, and you could drive hundreds or even thousands of visitors to your content. Many teacher-bloggers say Pinterest brings more traffic than any other social platform.
A simple weekly schedule might look like this:
- Write one blog post during the week
- Create Pinterest images on Saturday
- Schedule social media posts for the coming week on Sunday
This keeps your blog growing steadily without overwhelming your teaching schedule.
–
Creating Mini-Courses for Teachers or Students
Online courses can become a steady income stream once created.
The beauty is that you create them once and sell them repeatedly.
Course Type | Realistic Price | Time to Create |
|---|---|---|
Subject help (math, reading, etc.) | $15-$50 | 10-20 hours |
Teaching techniques | $20-$75 | 15-30 hours |
Classroom management | $15-$60 | 10-20 hours |
Tech skills for teachers | $15-$50 | 8-15 hours |
Parent resources | $15-$50 | 10-20 hours |
Test preparation | $20-$75 | 15-30 hours |
Teacher career help | $25-$100 | 20-40 hours |
Special education strategies | $25-$90 | 15-35 hours |
Start small with a mini-course rather than trying to create a massive program.
A focused 1-2 hour course on a specific topic is easier to create and often sells better than lengthy courses.
You don’t need fancy equipment to record course videos. A smartphone with a tripod, basic lighting, and a $20 lapel microphone will give you good enough quality to start. Clean audio is actually more important than perfect video.
Consider starting with a topic you teach repeatedly.
If you find yourself explaining the same concept or technique over and over, that’s perfect course material. You already know how to teach it efficiently.
Structure your course into short, manageable lessons (5-15 minutes each). This makes it easier for busy teachers or students to complete. It’s also less overwhelming for you to create in small chunks.
–
Finding Time: Teacher-Friendly Schedules
The biggest challenge for teacher-entrepreneurs is finding time. Here’s how to fit passive income projects into your busy teaching schedule:
When You Have This Time | Best Tasks To Do | What You Can Finish | Helpful Tools | Ways to Save Time |
|---|---|---|---|---|
15-30 minutes | Answer customer questions, quick social posts | 2-3 small tasks | Save response templates | |
1-2 hours (evening) | Edit materials, update products | 1 small product | Use product templates | |
Weekend morning (3 hrs) | Create new resources, record videos | 1 complete product | Canva, Loom for recording | Reuse your formats |
Weekend afternoon (3 hrs) | Email marketing | Week of posts | Batch similar tasks | |
School breaks (full days) | Create course content, multiple products | 3-5 products | Focus on one project | |
Summer vacation | Plan your product line, big projects | Full course, 10-15 products | Create product families | |
School year (5 hrs/week) | Maintenance and small updates | 1 product every 2 weeks | Google Calendar blocks | Set specific work hours |
Yearly planning | Plan seasonal product releases | 4 seasonal launches | Google calendar | Create content calendar |
The “weekend warrior” approach works well for many teacher-entrepreneurs. Dedicate one weekend morning (like Saturday 8-11 AM) to creating new products. You might be surprised how much you can accomplish in a focused 3-hour block.
Use summer breaks strategically. Rather than trying to create everything during the school year, use summer vacation to build up an inventory of products that you can release gradually throughout the school year.
Batch similar tasks together to save time and mental energy.
E.g. Create all your social media posts for the week in one sitting, or design several related worksheets in one session instead of switching between different types of tasks.
Set boundaries to prevent burnout. It’s better to consistently spend 5 hours a week on your side business than to work 20 hours one week and then nothing for a month because you’re exhausted.
–
Now that you’ve got a handle on managing your time, let’s explore even more ways to use your teaching skills to earn extra money.
–
Beyond Digital Products: More Teacher Side Hustles
Teaching is a rewarding profession, but many teachers need extra money to reduce financial stress.
Beyond selling digital products, there are lots of side hustle ideas that let you use your teaching skills to earn extra cash.
Online tutoring has become huge for teachers looking for side income. You can join an established tutoring company or, if you’re tech-comfortable, create your own website to find students.
Many teachers earn a few hundred dollars per week teaching online in their own hours. The pay varies wildly though – anywhere from $25-50 per hour depending on your subject and experience. Online platforms have changed everything for teachers wanting to earn extra money.
I believe freelance writing is an overlooked opportunity for teachers with strong writing skills.

Educational blogs, curriculum companies – they’re always looking for teacher perspectives. This side job provides both a creative outlet and extra income.
Not everyone enjoys writing, of course, but those who do might find it less draining than more teaching.
Summer brings its own possibilities. Summer school and summer camps often need experienced teachers and pay well for short-term commitments.
For those who speak a second language, teaching English online to international students remains in high demand – though the hours can be odd sometimes due to time zones.
The local market still has opportunities if you prefer getting away from the computer. Pet sitting gigs, coaching opportunities at local schools, perhaps even data entry work can be a low risk option to earn extra money. Not as scalable as online work, but maybe that’s not what you’re after.
Social media platforms have created entirely new side hustle possibilities too. Teachers become content creators almost accidentally sometimes, sharing exclusive content about classroom management or teaching approaches. Some have built a small business just from selling printables or offering popular courses.
For new sellers worried about jumping in – remember that every successful teacher-entrepreneur started somewhere.
Smart ways to begin include focusing on what you’re already good at, picking just one social media platform to master, and growing step by step.
What’s interesting is how these side hustles can sometimes complement what you’re already creating.
Those classroom materials you’ve organized? They might be perfect starting points for both digital products AND your other income streams.
–
Growing Your Teacher Side Business
Once you’ve got the basics running, you might be ready to expand your teacher business.
Here are signs you’re ready to grow:
1/ You’re consistently selling products and getting positive feedback
When customers repeatedly ask for more or similar products, that’s a strong signal to expand in that direction.
2/ You’ve maxed out the time you can personally invest
When you can’t keep up with customer questions or product creation yourself, it might be time to get help.
3/ Your income is steady enough to reinvest
Ideally, wait until your side business is bringing in at least $200-300 monthly before spending much on growth.
Getting affordable help is easier than you might think.
Virtual assistants can handle many tasks, freeing you to focus on creating products. Start by outsourcing simple, repetitive tasks like formatting or social media posting.
Create products that naturally sell together.
For example, if your math worksheet bundle sells well, create assessment materials and lesson plans that complement it. Customers who buy one are likely to buy the matching resources.
Some teachers eventually scale back their classroom hours as their passive income grows. This usually happens gradually – perhaps moving to part-time teaching after 2-3 years of successful product sales. The teacher-entrepreneurs who succeed long-term typically reinvest a portion of their earnings back into their business.
–
Beyond Digital Products: More Ways to Earn
Once you’ve established some digital product income, you might want to explore other passive income streams:
Starting a teacher YouTube channel doesn’t require fancy equipment
You can begin with basic gear costing under $100.
Focus on sharing practical teaching tips, classroom tours, or explanations of difficult concepts. YouTube pays creators through ad revenue once you reach 1,000 subscribers and 4,000 watch hours.
Educational podcasts can generate income through sponsorships and listener support
Teachers can turn their expertise into audio content that makes money. Start with topics you’re passionate about teaching. Here are some podcasting tips.
Self-publishing books on Amazon KDP costs nothing upfront
Take your best teaching strategies or subject expertise and create short, focused guides for teachers or parents. Amazon handles printing and shipping; you just upload your manuscript and cover.
Print-on-demand services let you sell physical products without inventory
Design teacher t-shirts, mugs, or posters through services like Printful or Printify, and they’ll produce and ship items only when someone orders. No upfront costs or boxes of merchandise in your garage.
Building an email list of interested teachers is valuable for any passive income venture
Offer a free resource to encourage signups, then regularly share teaching tips and occasionally promote your paid products. Most successful teacher-entrepreneurs say their email list is their most valuable asset. You can use BirdSend email marketing tool to build your list and send automated emails as well as weekly/monthly newsletters.
–
Getting Started Checklist
Here’s your step-by-step plan to launch your teacher side business:
Week 1: Research & Selection (Days 1-2)
- Spend 30 minutes browsing your teaching files folder
- Identify 3-5 resources you’ve created that got positive feedback
- Select ONE resource type that matches your strengths (worksheets, lesson plans, etc.) (refer to this matrix)
- Check your school district’s policies regarding teacher-created materials
- Make sure you have full rights to the content you’re planning to sell
- Create a simple folder on your computer labeled “Products to Sell”
Week 1: Setup & Planning (Days 3-7)
- Create a CartMango seller account (15 minutes)
- Connect your bank account or PayPal to receive payments
- Take 20 minutes to browse similar products to understand pricing
- Set a specific day/time (2-3 hours) on your calendar for product creation
- Make a list of any design elements you need (fonts, images, etc.) (Canva)
- Create a simple text-based brand name (you don’t need a fancy logo to start)
Week 2-3: Create Your First Product
- Clean up your selected resource, removing school-specific information
- Format your resource consistently (fonts, colors, spacing)
- Add a professional cover page with title and grade level
- Create a simple “About the Author” page with your teaching credentials
- Add page numbers and a table of contents if needed
- Convert to PDF format
- Create a backup of all product files in cloud storage (Google Drive)
- Test your product by having a colleague review it
- Make final edits based on feedback
- Write a clear, detailed product description (5-8 sentences)
- Take screenshots or create mockups of your product
Week 4: Launch Your Product
- Upload your product to CartMango
- Set your price ($3-$8 for your first product is realistic)
- Add 3-5 relevant tags to help people find your product
- Create a simple social media post announcing your product
- Share with 5-10 teacher friends directly (personal message)
- Post in 2-3 teacher Facebook groups (where self-promotion is allowed)
- Respond to any questions within 24 hours
- Track your first sales (even if it’s just one, that’s a win!)
- Send a thank you note to your first customer
Weeks 5-8: Refine & Add Products
- Review any feedback on your first product
- Make improvements based on customer suggestions
- Create a complementary resource that pairs with your first product
- Add your second product to CartMango
- Create a bundle option if you have multiple products
- Start collecting customer emails with permission (BirdSend)
- Set up a simple spreadsheet to track sales and product ideas
- Identify your next 2-3 product ideas based on customer requests
- Schedule specific creation time on your calendar
Weeks 9-12: Expand Your Offerings
- Create your third product
- Look for patterns in what’s selling best
- Focus your efforts on your most popular product type
- Create a simple freebie to attract new customers
- Ask satisfied customers for testimonials
- Share a “behind the scenes” post about your teacher business
- Analyze your pricing strategy and adjust if needed
- Set specific income goals for the coming months
- Plan your product release schedule around school calendar
Months 4-6: Systems & Growth
- Set up a basic email newsletter for customers
- Create email templates for frequently asked questions
- Consider starting a simple blog or YouTube channel
- Create a content calendar for your second income stream
- Batch create multiple products during school breaks
- Create seasonal products 6-8 weeks before they’ll be needed
- Research one virtual assistant task you could outsource
- Review your time management system and adjust as needed
Months 7-12: Scale Your Business
- Reach minimum 6 products in your store
- Evaluate which products bring the most income for least effort
- Create updated versions of your best-selling products
- Consider raising prices on premium resources
- Set up automated email sequences for new customers
- Develop a quarterly product launch schedule for next year
- Calculate your average monthly income from your side business
- Set specific financial goals for year two
- Plan how you’ll use your teacher business income
- Celebrate your accomplishment of building a real side business!
The hardest part for most teachers is just getting started. Once you’ve made your first sale, you’ll have proof that your knowledge and materials have value beyond your own classroom.
–
Common Teacher Questions
Here are answers to questions teachers frequently ask about passive income:
How do I fit this around my teaching schedule?
Start small with just 3-5 hours weekly, perhaps one weekend morning. Use the time management table above to identify pockets of time in your schedule. Many teachers find they become more efficient at both teaching and creating products with practice.
What if no one buys my first product?
This happens to almost everyone at the beginning. If a product doesn’t sell, don’t take it personally – just gather feedback, make improvements, and try again. Sometimes a simple title change or better description is all that’s needed.
Do I need to show my face in videos or photos?
Not at all. Many successful teacher-sellers never show their face. You can create screencasts, use animation, or focus on your materials rather than yourself. Privacy is a valid concern for many teachers.
How much money will I need to spend to start?
You can start with under $50. Most teachers already have the basic tools (computer, smartphone) needed to create and sell digital products. Avoid expensive courses or software until you’re making consistent sales.
Can I sell materials I created for my classroom?
Generally yes, but check your school district’s policies first. In most cases, teachers own the copyright to materials they create, even if made for their classroom. Just be sure not to include school logos or identifiable student information.
–
Even a modest passive income stream of $200-300 monthly can make a big difference over time.

That’s an extra car payment, student loan payment, or a boost to your retirement savings.
Start small, be consistent, and focus on helping other teachers or students solve real problems.
Your expertise is valuable – it’s time to share it beyond your classroom walls.
Related
- SendOwl vs SamCart: The Recurring Revenue Jail (2026)
- ThriveCart vs ClickFunnels: When more features hurt (2026)
- SendOwl vs Payhip: The “You-Leave-You-Lose” Model (2026)
- SamCart vs Kajabi: The Income Hostage Trap (2026)
- Sellfy vs Payhip: The Recurring Revenue Prison (2026)
- Podia vs Gumroad: The Recurring Revenue Handcuffs (2026)
- SendOwl vs Gumroad: The Recurring Revenue Black Hole (2026)
- Gumroad vs Sellfy: The Vendor Lock-in Cage (2026)
- Gumroad vs Payhip: The Hidden Trap for Creators (2026)
- ThriveCart vs SamCart – The Subscription Hostage Trap (2026)
