
30 specific tasks that take you from 0 to your first $1,000. Day 22: You’ll start work on your 1st paid project…
Find Your Best Starting Point
But first, find your situation in the chart below. This will show you the fastest path to earning money based on your current reality.
The Writing Business Starting Point Chart
Your Situation | Fastest Path | First Actions | Best Services to Offer |
|---|---|---|---|
No writing samples + Need money ASAP | Quick Cash Route | Focus on friends/family leads, use ready-made templates | Blog updates, simple emails, social media posts |
Some writing examples + 10-15 hrs/week | Steady Builder Path | Create targeted samples, contact warm & cold leads | Blog posts, newsletters, product descriptions |
Published work exists + 15+ hrs/week | Accelerated Launch | Use existing work, focus on referrals & direct emails | Case studies, website copy, specialized content |
Full-time job + 5-10 hrs/week | Side Hustle Starter | Weekend batch work, focus on flexible deadlines | Blog posts, content updates, basic editing |
Industry knowledge + Any schedule | Expert Fast Track | Lead with your expertise, target specific industry | Technical content, specialized blogs, white papers |
Good network + Limited experience | Connection Converter | Start with people you know, ask for introductions | Depends on your connections’ needs |
What Your Chart Result Means
Each path has different timelines and expectations.
For example, a Quick Cash Route might get you paid in 14 days, while an Expert Fast Track could take 30 days but lead to higher-paying work.
Aligning career goals with personal values and strengths is key for professional success. (Source)
Your biggest challenge will depend on your path. Quick Cash writers need to fight charging too little, while Connection Converters must overcome fear of asking for work.
The 30-Day Challenge: Your Path to $1,000
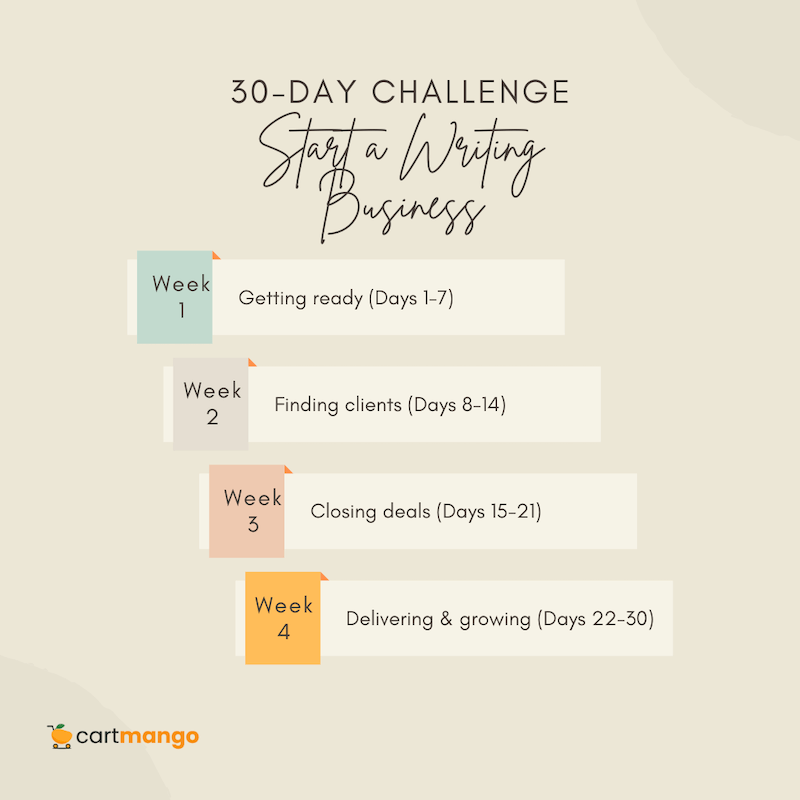
This 30-day roadmap gives you specific tasks for each day.
Follow it step by step to reach your first $1,000.
Week 1: Getting Ready (Days 1-7)
Day 1: Choose Your Service
Pick one service package that matches your path from the chart above. Keep it simple. If you’re a Side Hustle Starter, choose blog posts or content updates. If you’re on the Expert Fast Track, focus on specialized content in your field.
Day 2: Create Your First Sample
Make one writing sample that shows what you can do. This doesn’t need to be for a real client. Write a blog post about something you know well, using a clear structure: introduction, 3-5 main points, and conclusion.
Day 3: Set Up LinkedIn
Create or update your LinkedIn profile. Add a professional-looking photo, a headline that says what you write (like “B2B Technology Writer”), and a simple summary of what you offer. Don’t worry about making it perfect.
Day 4: Build Your Client List
Make a list of 20 potential clients. If you’re on the Connection Converter path, list people you already know. If you’re on the Quick Cash Route, look for local businesses with poor website content. For other paths, find companies in industries you understand.
Day 5: Send Your First Emails

Send emails to 5 people from your list. Keep them short: introduce yourself, mention something specific about their business, explain how you can help, and ask if they need writing help. That’s it.
Day 6: Create Your Price Sheet
Decide what you’ll charge for your services. For beginners, start with the lower end of the ranges in our pricing section below. Write these numbers down so you’re not making up prices during client conversations.
Day 7: Send More Emails
Send 5 more emails to people on your list. Use what you learned from Day 5 to improve your approach. If you got no responses, try a different subject line or a shorter message.
Weekend Task: Review any responses you’ve gotten. Adjust your service offering if needed based on questions or feedback.
–
Week 2: Finding Clients (Days 8-14)

Day 8: Follow Up
Send a short follow-up to anyone who hasn’t responded. Something simple like: “Just checking if you received my previous email about writing services. I’m available to discuss if you’re interested.”
Day 9: Join Groups
Join 2 Facebook or LinkedIn groups where your potential clients hang out. For example, if you want to write for small businesses, join small business owner groups. If you want to write about health, join health professional groups.
Day 10: Introduce Yourself
Post a brief introduction in those groups (if allowed). Don’t pitch your services directly. Instead, mention your background and ask a thoughtful question related to content needs in the industry.
Day 11: Send More Outreach
Send 5 more personalized emails to new potential clients. Try to reference something specific from their website or social media to show you’ve done your homework.
Day 12: Second Follow-Up
Follow up again with your first batch of contacts. This time, add a bit of value: “By the way, I noticed your About page could use an update to include your new services. I’d be happy to discuss how I could help with that.”
Day 13: Engage on LinkedIn
Comment thoughtfully on 3 LinkedIn posts from potential clients or industry influencers. Your comments should add value, not just say “Great post!”
Day 14: Direct Message Connections
Send messages to 3 people you’re already connected with on LinkedIn. Ask how business is going and if they need help with any writing projects.
Weekend Task: Prepare for client calls. Write down answers to common questions like “What’s your experience?” and “How do you work?”
–
Week 3: Closing Deals (Days 15-21)
Day 15: Client Calls
When you get interest from potential clients, schedule calls using a free tool like Calendly. During the call, ask about their goals, listen more than you talk, and explain clearly how you can help.
Day 16: Send Proposals
Send a simple proposal to anyone who seemed interested. Include what you’ll deliver, when you’ll deliver it, how many revisions you’ll provide, and your price. Keep it to one page.
Day 17: Proposal Follow-Up
Send a friendly reminder to anyone who hasn’t responded to your proposal. “Just checking in on the proposal I sent yesterday. Let me know if you have any questions.”
Day 18: More Outreach
Send 5 more emails to new potential clients. Keep refining your approach based on what’s working.
Day 19: Client Work Plan
For any client who has agreed to work with you, create a simple work plan. List what you need from them, what you’ll deliver, and when.
Day 20: Expand Your List
Add 10 more potential clients to your outreach list. Look for companies similar to those who have shown interest in your services.
Day 21: Check-In Messages
Send a final “still interested?” message to anyone who showed interest but hasn’t committed. “I wanted to check if you’re still interested in the writing services we discussed. I’m currently scheduling new projects for next week.”
Weekend Task: Adjust your service offering based on feedback. If everyone’s asking for something specific, consider making that your main focus.
–
Week 4: Delivering and Growing (Days 22-30)
Day 22: Start Client Work
Begin work on your first paid project. Follow the process you outlined in your work plan. Start by gathering all the information you need from the client.
Day 23: Continue Outreach
Send 5 more emails while working on your project. Don’t stop marketing just because you have one client.
Day 24: Document Your Process
As you work, write down each step you take. This will help you work faster on future projects and eventually train others if you scale up.
Day 25: More Follow-Ups
Follow up with potential clients using a different angle. Share a relevant article or tip that might help their business.
Day 26: Deliver Your Work
Deliver your first draft to the client with a clear message. Explain what you’ve done and what kind of feedback would be most helpful.
Day 27: Ask for Referrals
Ask your first client if they know anyone else who might need writing help. “I’ve enjoyed working with you and have some availability coming up. Do you know any other businesses who might need similar help?”
Day 28: Handle Feedback
Process any feedback from your client. Make requested changes promptly and professionally.
Day 29: Request a Testimonial
Once the client is happy with the final work, ask for a short testimonial. “Would you mind sharing a few words about your experience working with me? This would be really helpful for my new business.”
Day 30: Celebrate and Plan
Take stock of what you’ve accomplished. If you’ve reached $1,000, celebrate! If not, identify what’s working and plan your next 30 days.
–
Toggl’s free time tracking tool can help you see exactly how you’re spending your work hours and where you might be able to improve your efficiency.
–
Foundations for a Thriving Freelance Writing Business
Now that you have your 30-day action plan, let’s look at some key building blocks that will strengthen your freelance writing business as you complete those daily tasks.
Finding Your Writing Niche and Style
Writing Type | Description | Earning Potential |
|---|---|---|
Blog writing | Creating regular blog posts for businesses | Good starting point for new freelance writers |
Content writing | General website content, guides, and resources | Steady freelance writing work with many opportunities |
Technical writing | Instructions, manuals, and complex topics made simple | Higher rates due to specialized knowledge |
Sales pages | Persuasive content that convinces readers to buy | Better rates once you have some experience |
Your writing skills will grow fastest when you focus on one type of content. Good writing comes from practice writing in your chosen area. Many successful freelance writers started by picking one specific writing niche instead of trying to write everything.
Industry specialization is one of the top factors affecting freelance writing income. An anonymous writer specializing in eCommerce and B2B SaaS reported earning a minimum of $1,500 per article and approximately $300,000 in 2021, while a lifestyle writer was on track to make only $24,000 annually. (Source)
Building Your Online Presence
While the 30-day challenge focuses on LinkedIn, here’s how different online platforms can help your freelance writing business grow:
Platform | Main Benefit | Getting Started Tip |
|---|---|---|
Social media accounts | Connect with potential customers in your target audience | Pick just one platform to start (LinkedIn, X/Twitter, or Facebook) |
Facebook groups | Find writing opportunities and connect with other writers | Join 2-3 groups where your ideal clients hang out |
Job boards | Regular source of freelance writing opportunities | Check ProBlogger and Freelance Writing Jobs weekly |
Your own website | Makes your freelance business look professional (but not required to start) | Begin with a free portfolio site until you have enough money coming in |
When you’re starting freelance writing, you don’t need to spend money on a fancy website.
Focus first on creating good writing samples and finding your first clients.
Managing Your Freelance Business
Basic business setup doesn’t have to be complicated.
Here’s what you actually need when you start freelancing:
- Internet access and a computer to write online
- A way to track income from your writing work
- A separate bank account for your freelance business (optional but helpful)
You don’t necessarily need a business license or business name right away. Many professional writers simply use their own name when they begin their writing career.
The big difference between struggling writers and those who earn good money is often just organization and consistency. Set specific hours to improve your writing skills, reach out to potential clients, and complete work for current clients.
As you gain experience, you’ll connect with other freelancers who can become a valuable support network. They might even pass along extra writing jobs when they’re too busy, which makes finding work much easier.
Now that you understand these fundamentals, let’s look at how to create writing samples that will actually get you hired…
–
Create Samples That Get You Hired
You need samples to show clients what you can do.
Here’s how to create effective ones fast.
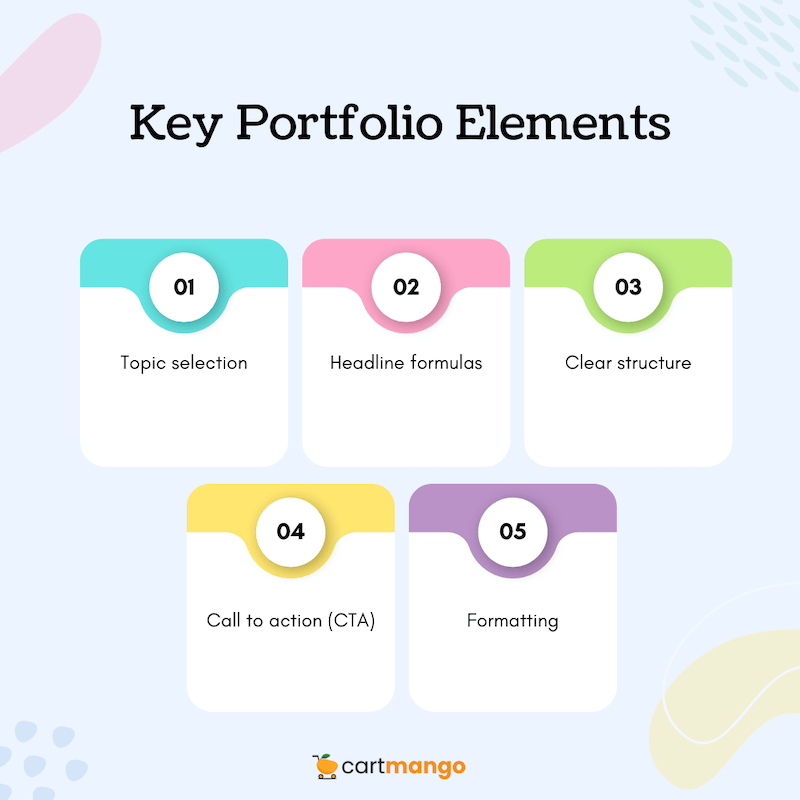
Make Portfolio Pieces Clients Want to See
Portfolio Element | How to Create It | Why It Works |
|---|---|---|
Topic Selection | Choose topics in your target industry | Shows you understand the client’s field |
Headline Formulas | “How to [Achieve Result] Without [Pain Point]” | Shows you know how to grab attention |
Clear Structure | Use subheadings, bullet points, short paragraphs | Shows you can organize information clearly |
Call to Action | End with next steps for the reader | Shows you understand marketing basics |
Formatting | Use Hemingway Editor to ensure readability | Makes your writing easy for anyone to read |
Quick Portfolio Setup (No Website Needed)
Portfolio Tool | How to Use It | Advantage |
|---|---|---|
Google Drive | Create a folder with your best samples | Free, easy to share with a link |
Google Doc / Canva | Use Google Doc or Canva to create your portfolio | So easy to use, anyone can quickly create |
LinkedIn Articles | Publish your samples as LinkedIn articles | Shows up on your profile automatically |
Medium | Post samples on a free Medium account | Gets your writing seen publicly |
Sample Script | “I’ve created a similar piece about [topic] that I can share with you” | Easy way to mention your samples during calls |
You don’t need a website to start getting clients. Focus on creating and sharing relevant samples instead.
–
Copy This Writing Business Blueprint
Many new writers waste time trying to figure everything out from scratch. Here’s a proven approach you can copy directly.
Proven Service Packages That Sell
Package Name | What’s Included | Price Point | Perfect For |
|---|---|---|---|
“Content Refresh” | Update 3-5 existing blog posts on client’s website | $75-125 per post | Clients with outdated content |
“Email Welcome Series” | 5 emails for new subscribers | $350-500 total | Businesses with email lists |
“Monthly Blog Bundle” | 4 blog posts per month with research and SEO | $600-1,000 total | Businesses needing regular content |
“Website Basics” | 5 essential website pages (Home, About, Services, FAQ, Contact) | $750-1,200 total | New businesses or website redesigns |
Service packages focus on value delivered and improved efficiency, resulting in clients having a higher perceived value of the services. (Source)
–
Client-Getting Messages That Work
Message Type | Template |
|---|---|
First Contact Email | Subject: [Company name]’s content |
LinkedIn Connection | Hi [Name], I noticed your work in [industry] and was impressed by [specific thing]. |
Asking for Recommendations | Hi [Client Name], I’m so glad you’re happy with [project]. |
Follow-up Message | Hi [Name], |
–
Set Prices That Get You Hired

Pricing is where many new writers get stuck. Here’s a simple approach that works.
Step | Action | Example |
|---|---|---|
Create 3 Pricing Tiers | Offer Good, Better, Best options | Basic: Blog post with minimal research |
Focus on Value, Not Hours | Explain outcomes, not your time | “This will help you rank higher in Google” instead of “This takes me 3 hours to write” |
Start Lower, Then Raise | Begin at the lower end of market rates | Start at $150 per blog post, then increase to $200 after 5 successful projects |
Set Project Minimums | Don’t take tiny projects | Minimum project size: $300 |
Check the Editorial Freelancers Association rate survey to compare your rates with industry standards.
More Pricing Examples
Service Type | Beginner Rates | Experienced Rates |
|---|---|---|
Blog post (1000 words) | $150-250 | $250-400 |
Case study (1000-1500 words) | $300-500 | $500-1000 |
Website page (per page) | $200-300 | $300-600 |
Email series (per email) | $75-125 | $125-250 |
Social media posts (batch of 10) | $150-250 | $250-400 |
Product descriptions (per 150 words) | $30-50 | $50-100 |
When clients say your prices are too high, don’t immediately lower them.
Instead, ask what budget they had in mind, then adjust the scope to fit their budget.
–
Handle Clients Without Headaches
Once you get clients, you need to manage them effectively to ensure smooth projects and repeat business.
Simple Client Management
Client Management Tool | How to Use It | Why It Works |
|---|---|---|
3-Question Project Form | Ask: | Gets essential information in simple format |
Basic Project Agreement | Include: what you’ll deliver, when, number of revisions, payment terms | Prevents misunderstandings and extra work |
Dedicated Project Folder | Create one folder per client with all files | Keeps everything organized and easy to find |
Quality Check Tool | Use Grammarly before submitting work | Catches spelling and grammar errors before clients do |
Deal With Changes Painlessly
Revision Management | How It Works | Why Clients Like It |
|---|---|---|
Two-Round System | Round 1: Major changes | Sets clear expectations from the start |
Feedback Form | Ask specific questions: “Which parts work best? Which need improvement?” | Helps clients give useful feedback |
Extra Revisions Script | “I’m happy to make those additional changes. Since we’ve completed the two rounds included, there will be an additional fee of [amount].” | Clear, professional way to handle extra work |
Change Prevention | Get detailed brief upfront with examples of content they like | Taking time to understand exactly what your client wants at the start of a project saves you from wasting energy on multiple changes later. (Source) |
Here’s a video on how to create boundaries for yourself and your business (so you actually stay sane):
–
Grow Beyond Your First $1,000
Once you’ve reached your first $1,000, it’s time to expand and increase your income.
Your $5K Plan
Growth Strategy | How to Implement | Expected Result |
|---|---|---|
“One to Three” Recommendation System | Ask every satisfied client for 3 recommendations | More new clients when you complete more projects |
Monthly Content Package | Create a package clients pay for monthly (e.g., 4 blog posts + social media) | More predictable monthly income |
Additional Services Script | “I noticed you could also benefit from [additional service]. Would you like to see options?” | 20-30% of clients add additional services |
Monthly Billing | Take automatic monthly payments via CartMango | Steady cash flow, no chasing payments |
Keep It Simple As You Grow
Simplicity Tactic | How to Do It | Benefit |
|---|---|---|
Blocked Calendar | Mornings: Client work | More productive time |
Client Tracking Spreadsheet | Columns: Client, Project, Due Date, Payment Status, Follow-up | Nothing gets forgotten |
15-Minute Daily Routine | 5 min: Review schedule | Stays on top of business without stress |
Growth Without Complexity | Add income before adding complicated systems | Focus on the most important things |
–
From How to Start a Writing Business -> Your First $1K -> Writing Empire
Your first $1,000 is just the beginning.
To reach $5,000 per month, you’ll typically need 5-7 regular clients or a mix of one-time and monthly projects. At $10,000 per month, most solo writers have 8-12 regular clients or a smaller number of high-value clients.
As you grow, keep your business simple. Many writers fail because they make things too complicated.
Focus on finding slightly better clients with each cycle of growth. Raise your rates by 10-25% with each new batch of clients.
Throughout this guide, I’ve given you exactly what you need—nothing more, nothing less—to start making money as a writer in the next 30 days.
No fancy terms, no complicated systems, just straightforward steps that work.
And before I end this, I’ll leave you with a quick summary of the challenge…
30-Day Challenge Quick Reference
Timeline | Key Actions |
|---|---|
Days 1-7 | Day 1: Choose your service |
Days 8-14 | Day 8: Follow up |
Days 15-21 | Day 15: Client calls |
Days 22-30 | Day 22: Start client work |
Related
- SendOwl vs SamCart: The Recurring Revenue Jail (2026)
- ThriveCart vs ClickFunnels: When more features hurt (2026)
- SendOwl vs Payhip: The “You-Leave-You-Lose” Model (2026)
- SamCart vs Kajabi: The Income Hostage Trap (2026)
- Sellfy vs Payhip: The Recurring Revenue Prison (2026)
- Podia vs Gumroad: The Recurring Revenue Handcuffs (2026)
- SendOwl vs Gumroad: The Recurring Revenue Black Hole (2026)
- Gumroad vs Sellfy: The Vendor Lock-in Cage (2026)
- Gumroad vs Payhip: The Hidden Trap for Creators (2026)
- ThriveCart vs SamCart – The Subscription Hostage Trap (2026)